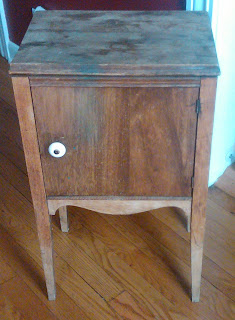
I apologize ahead of time for the fuzzy photos. My camera broke and is in the shop so I am working with the cell phone camera for the next week or two. And because I was short my camera I fear I did not remember to take pictures of all of my steps. In any case, I started by taking the door off and removing all hardware. I lightly sanded the entire table since there was no real finish to it. I then used wood glue to apply 2 wood appliques to the front of the door to jazz it up a bit!
Once the glue was set I primed and spray painted the entire table. I used plain white for this project. I then let the table dry overnight. The next day I sanded all the edges on the table using an 80 grit sanding block.
I then went over all the sanded edges with an ebony wood stain using a foam paint brush. As you can see I was not careful to be neat.
I let this sit for a few minutes and then used a towel to wipe off all my excess. I did all the edges and the appliques using this technique. I also swiped a few strokes of stain across front of door and top of table and wiped off to allow some stain to fall into all of the age marks to help define them! I then took some scrapbook paper I had found at Hobby Lobby for 59 cents a piece and cut them to fit all interior sides of the table, including the back of the door. I used Mod-Podge to adhere the paper and also used Mod-Podge over the top of the paper. I let this dry and then spray varnished the whole piece. I then affixed a new door knob I found at Hobby Lobby for $1.99 on sale and re-attached the door.
Voila!
A great new table for my tiny hallway! Perfect for storing all my candles and aroma oils!
Not bad for a total of $17.93!
Linking up to Homespun Happenings:
Pin It


WOW! What a lovely transformation!
ReplyDelete